HSL: An Intuitive Way to Represent Color in CSS


When writing CSS, the most common formats we use for expressing a color are either a hex code like #BADA55 or an RGB value like rgb(125, 130, 110). Design tools like Sketch or Figma often use these formats as their default.
However, there are other formats, such as HSL.
To quote MDN:
The hsl() functional notation expresses a color in the sRGB color space according to its hue, saturation, and lightness components.
Seeing color like an artist
You may be asking yourself why we would want something different if the hex and RGB formats are essentially ubiquitous.
One reason is that HSL models color in three dimensions, and these dimensions make a lot of sense to our perception of color as humans.
Let's take the hex code #BADA55. Just by glancing at it, do you have any idea what the actual color is? If you've been a front-end developer for as long as I have, you might know this one. But what if I change the code to #12DA55? How is the color affected?
What about rgb(12, 134, 200)? We know that RGB stands for red, green, and blue, so we can infer that the resulting color is a blend of those values. If the b is really high compared to the r and g, we can guess the color is on the blue side of the spectrum, but how would you get an orange or a yellow from blending these values?
The way RGB values are blended is not intuitive for us. After all, we were taught that blue + yellow = green — and there’s no yellow in RGB! Well, technically there is, but even then, mixing light colors is not the same as mixing paint colors.
Imagine that you wanted a slightly darker version of these colors; how can you get them without firing up Photoshop?
Enter HSL. Let's take a look at what each letter stands for:
Hue: Think of this value as the name of the color: red, blue, orange, etc. People generally describe color by referencing its hue. The hue value is represented by its position on a “color wheel,” from 0 to 360 degrees.
Saturation: This value tells us how intense the color is, from a dull grey to a burn-your-retina fire engine red. The scale goes from 0% (grey) to 100% (pure color).
Lightness: This value determines whether a color is light or dark, with the scale ranging from 0% light (black) to 100% light (white).


With these definitions under our belt, let's take some values and see what can we infer about them before seeing the color they represent:
h: 45deg, s: 0%, l: 50%Without knowing the values of the hue wheel, we can immediately tell by the other values that this is a completely grey color right in the middle of the lightness scale. In fact, it doesn't matter how much we change the hue value, the fact that the saturation is 0%, makes it a neutral grey.h: 93deg, s: 75%, l: 100%The same logic applies here. We might have no idea what the hue is, but we can tell by the lightness value of 100% that it is white. In this case, it doesn't matter what values we give the hue or the saturation, it will stay white.
Another thing to know about HSL is that it accepts an extra argument for an alpha value, which determines how transparent the color should be. Just like with the a in rgba, the syntax looks like this: hsl(75, 67%, 70% / 25%).
Now that you can see how intuitive it is to make sense of a color using this format, let’s figure out a quick way to darken a color a little bit using hsl.
Starting from a base color like hsl(75, 67%, 63%), all we need to do is adjust the lightness value: hsl(75, 67%, 40%). Remember, the lower the lightness value, the darker the resulting color will be.
While understanding HSL is simple, I’d be remiss if I didn’t mention that color, in general, is a complex subject. For example, each hue's saturation peaks at different lightness values because some hues are naturally darker than others, like yellow vs. blue. This means that just because a color’s saturation is at 100%, it doesn’t mean that the color is at its peak intensity; the lightness value still has an effect on it.
Let's take the value hsl(200, 100%, 84%), a blue color. Saturation is at 100% here, but at the same time we have a very high lightness value, so the resulting color is not as intense or bright as that particular hue could be. If we lower the lightness value, we'll start increasing the perceived intensity of the hue until it peaks. Once we reach that peak level, making it darker will start decreasing the intensity of the color. This up and down “wave” of intensity varies by hue.
Color theory is a very interesting and vast subject, one I can't get into too deeply in this article. Still, have a look at these charts from the Munsell system of color. While that system is designed for pigments and not light (as in screens), it still illustrates well what I'm describing:


Each chart is a different hue. Munsell uses the terms hue, value (instead of lightness), and chroma (instead of saturation).
From top to bottom, we go from high to low lightness without reaching black or white, which would be the same for each hue.
From left to right we go from low saturation (almost neutral grey) to the highest possible saturation for each hue.
Notice how yellow's saturation peaks at the highest lightness value (9/12) and blue more in the middle (6/14).
OK, let's move on and see how you can put your new knowledge of HSL into practice.
HSL + CSS properties = power
Everything we’ve talked about so far is interesting, but other than the admittedly cool benefit of knowing what a color might look like just by glancing at a hsl value and being able to quickly modify it, it's not that much different from our good old friends, hex and RGB.
Let’s think of a real scenario where hsl might actually come in handy and allow us to do things the other formats can’t easily do.
Say we are building a "Tag" component, and among its requirements, we see these listed:
They should be buttons.
There are three background colors available for our tags.
blue:
#ace3ffpurple:
#ddccffgreen:
#bcf1ca
On hover, a tag background color should get a little darker (values not provided).
First, let's get out of the way what could be the most obvious solution: just use JavaScript! If you’re thinking that there must be dozens of libraries that can do this for you, you are correct:

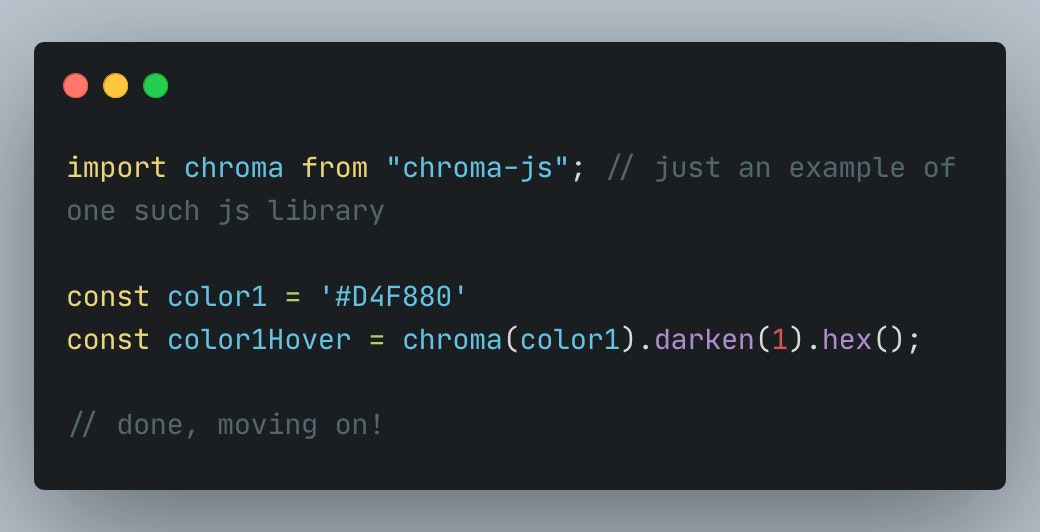
But where is the fun in that?! Plus, this solution means that we had to add an extra dependency just for this very specific use case.
Could we possibly think of a way to achieve this without a third-party library and, even better, do so while only using CSS?
To start, let's define a very simple Tag component. To simplify the examples, we are going to use React syntax, but very lightly, so this can be ported to anything from "vanilla" to Vue or whatever you prefer:

Our new component is very simple, and it takes two props: the text of the tag and a color from a predetermined set ('blue', 'purple' and 'green').
We add an extra class name on the button to handle the color with CSS. If the color value passed is not found on the set, the Tag will get a grey color.
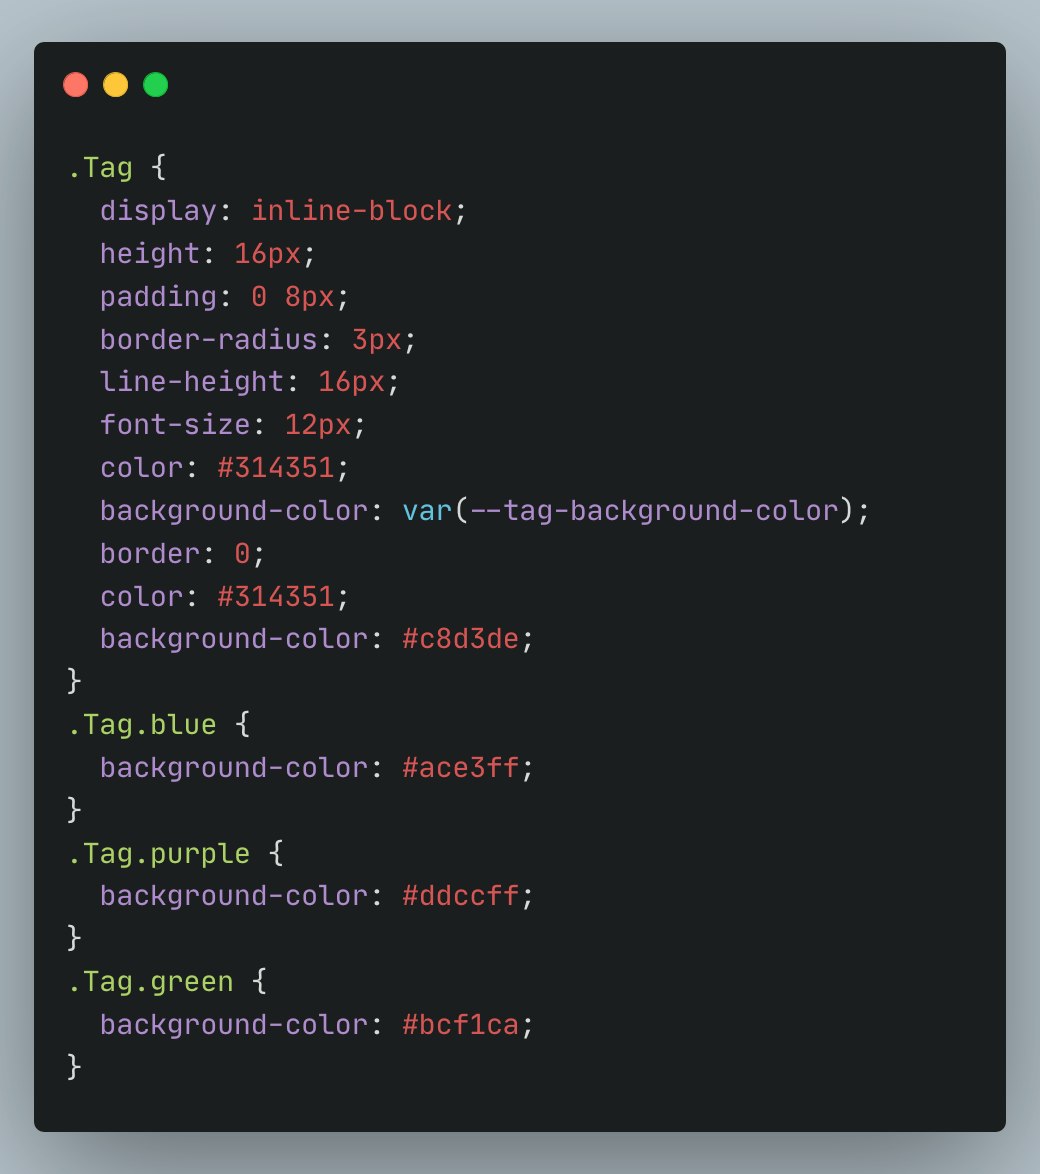
Let's style that a little bit, handling the colors:

So far so good! Let's refactor that by converting values to HSL and using CSS variables:

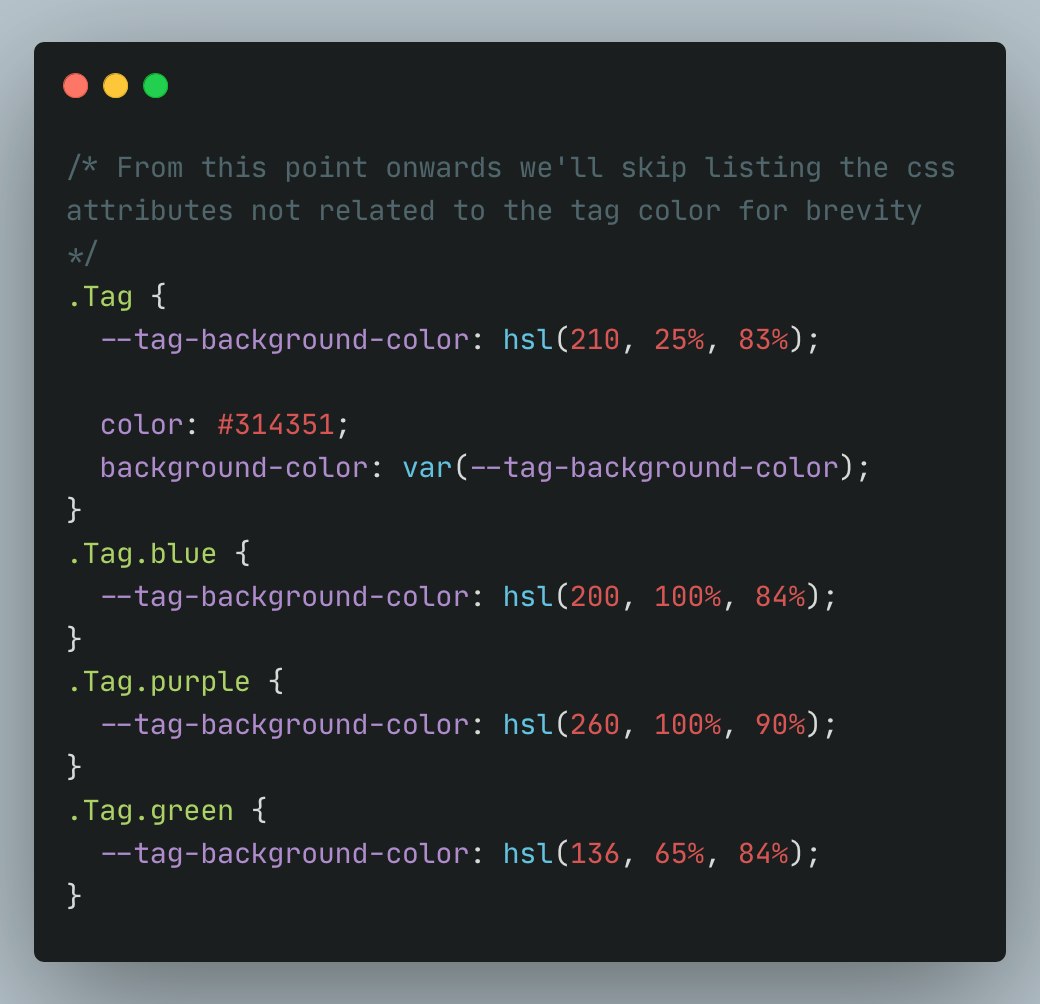
Notice how just by looking at the hsl values we can rapidly tell that those are very light colors. In the case of the blue and purple, the saturation is at 100%, which means they are as colorful as they can be at that level of lightness.


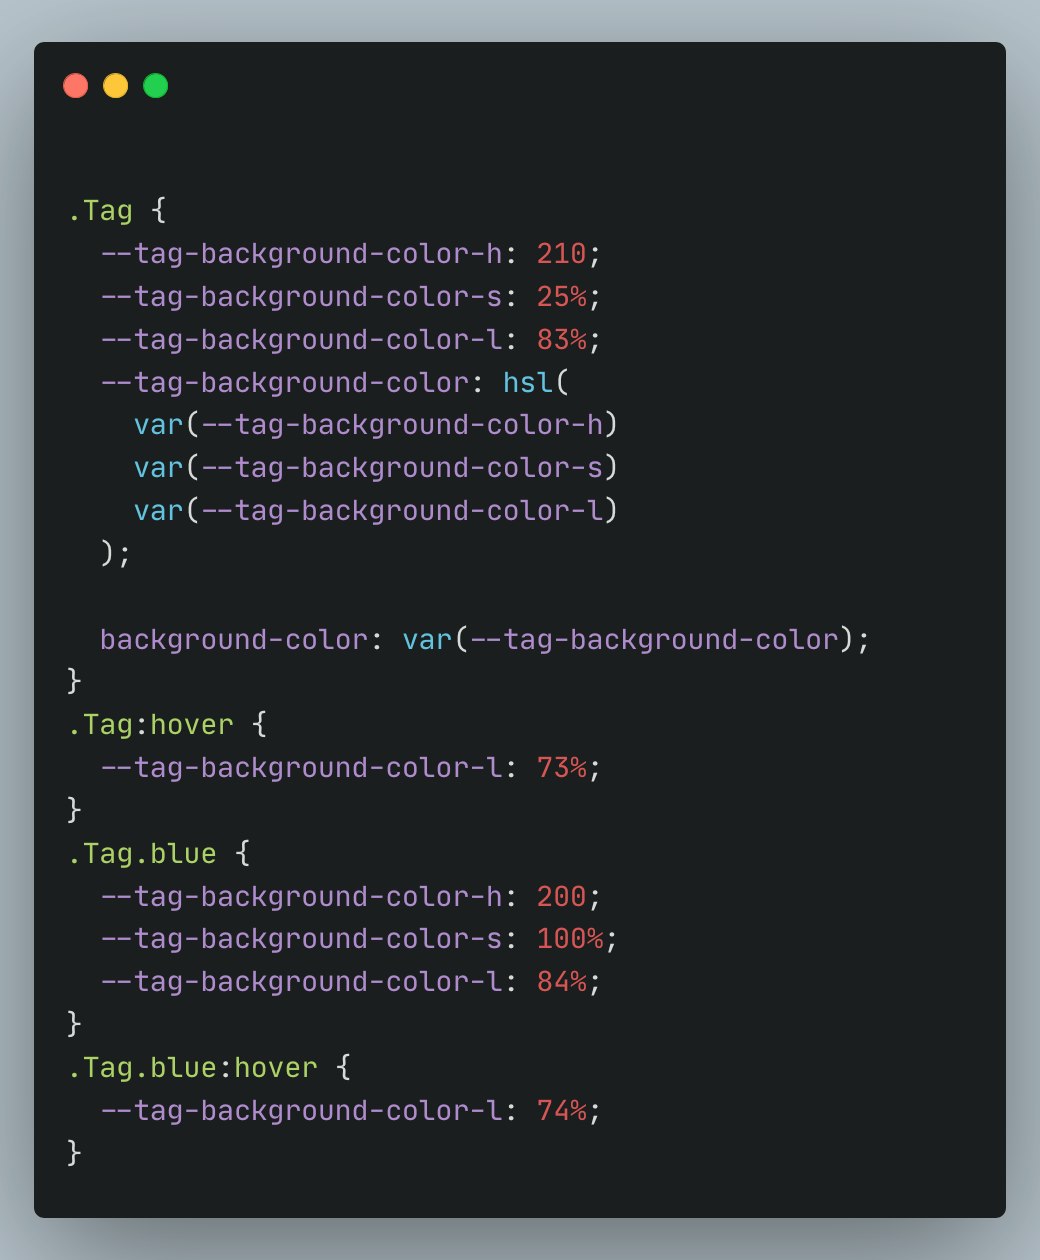
Time to implement the hover behavior. We know that we need to lower the lightness value to achieve a darker color with the same hue and saturation. To achieve that, it will be useful to break down our hsl values into their individual units:


So far, we haven't changed much, but notice how the CSS hsl function accepts CSS variables.
Finally, for the hover effect, let's reduce each color lightness value by 10%. To keep the example short, we'll just list one of the colors:

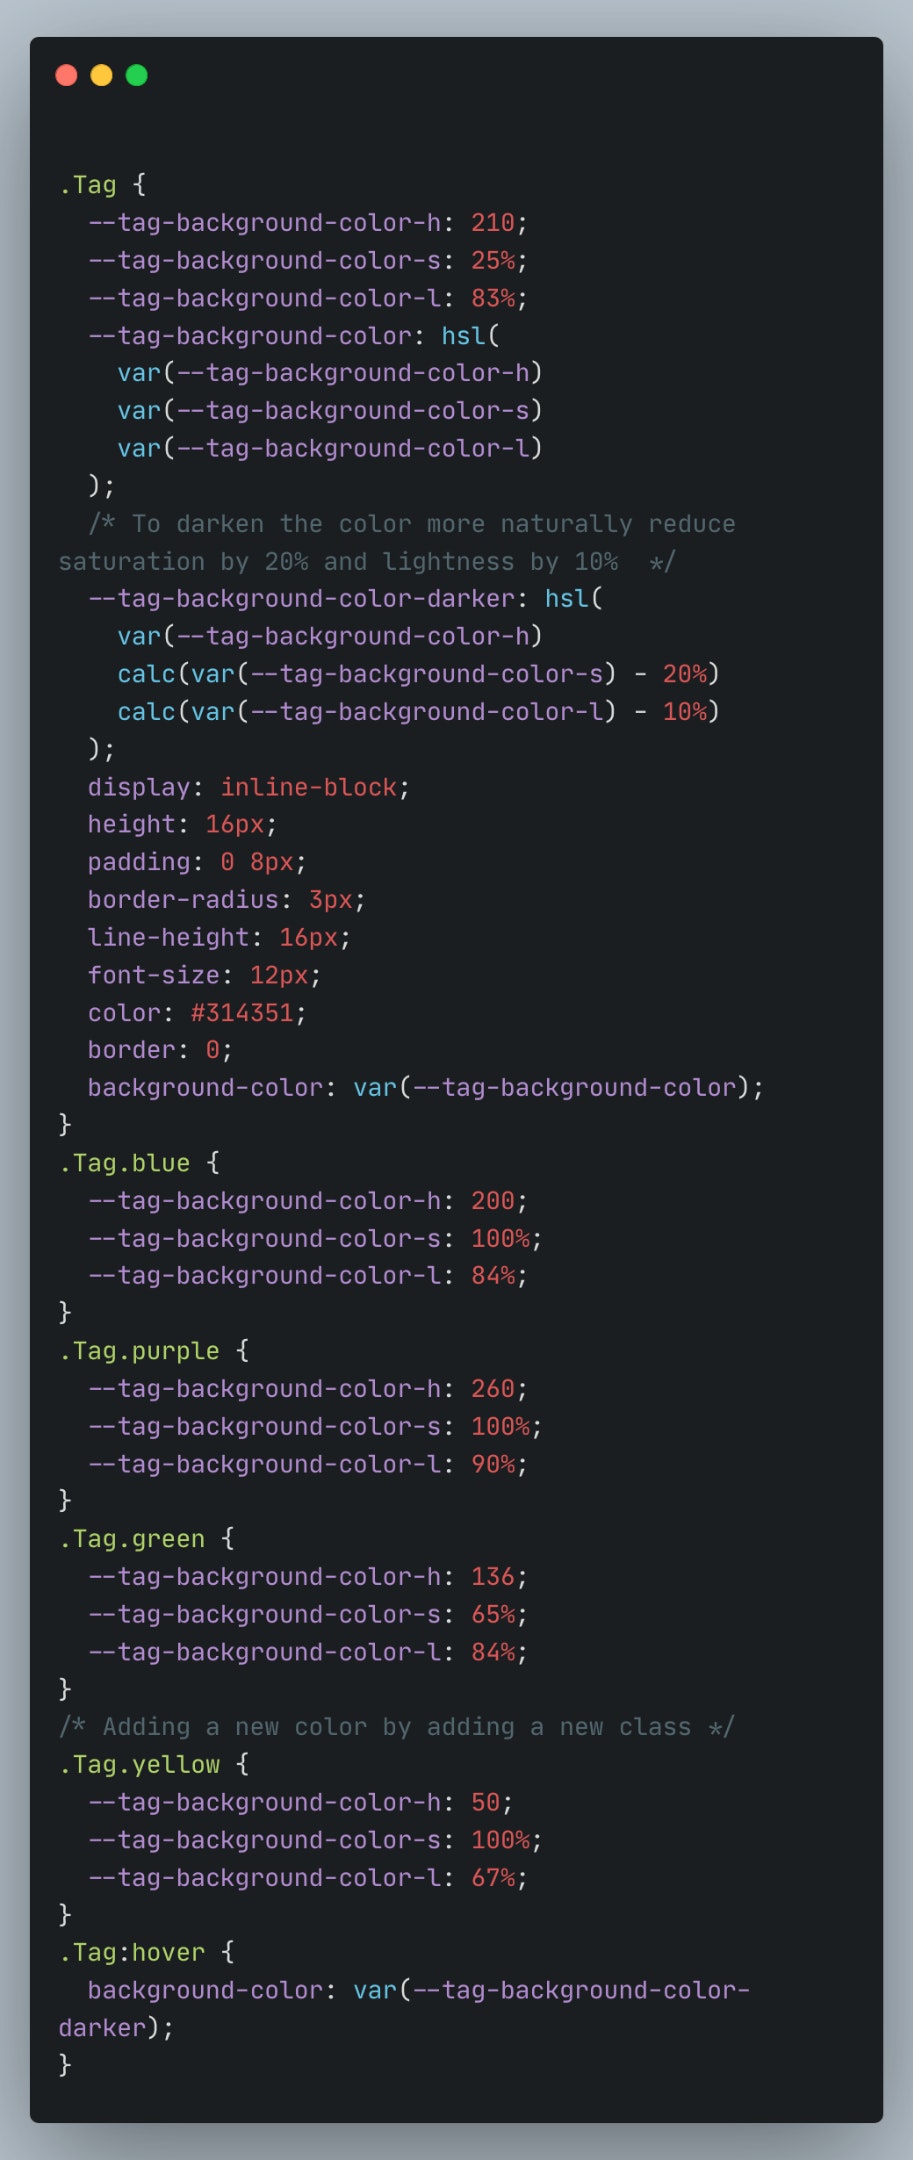
Before finishing up, let’s improve the example a bit. We would like to:
Eliminate some repetition, which will also allow us to easily add more Tag colors in the future.
Roughly take into consideration what we learned about saturation levels from the color theory explained earlier in the post.
The full example could look something like this:

The results
The difference is subtle and whether it looks better or not is subjective, but the goal here is to show you that it's possible to manipulate these values in creative ways with just CSS.
Before:


After:


Hopefully you found this discussion of color theory and HSL interesting and that it inspires you in your future projects!


Juan Pablo Lomeli Diaz
Juan Pablo is a Senior JavaScript Engineer at Help Scout, where he works mostly on design system things. Outside of pushing pixels, you’ll find Juan Pablo in places like Tokyo, Athens, or anywhere else his travels may lead. Connect with him on LinkedIn.

